
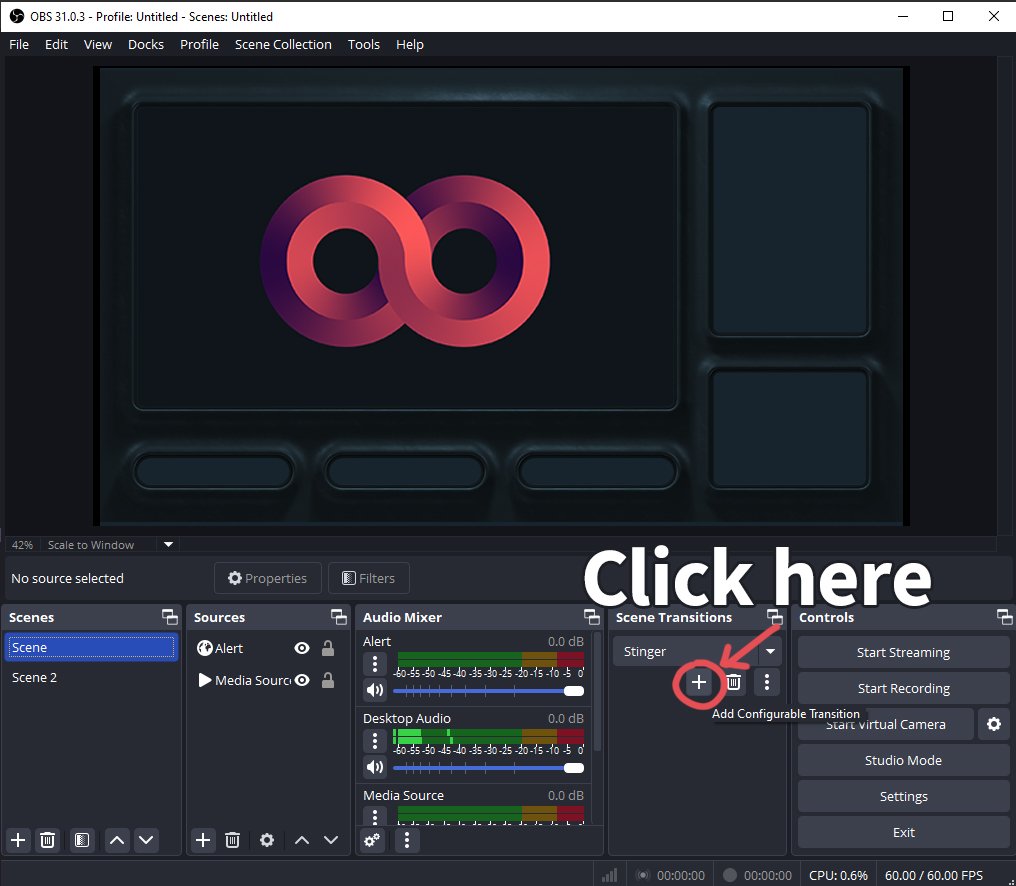
How to set up a Stinger Transition in OBS
1. Open OBS Studio
2. Go to the “Scene Transitions” Panel
You’ll find this in the bottom-right area of the interface,
near the Controls section.
3. Add a New Stinger Transition
• Click the plus icon (+) in the “Scene Transitions” dock.
• Select “Stinger” from the list.
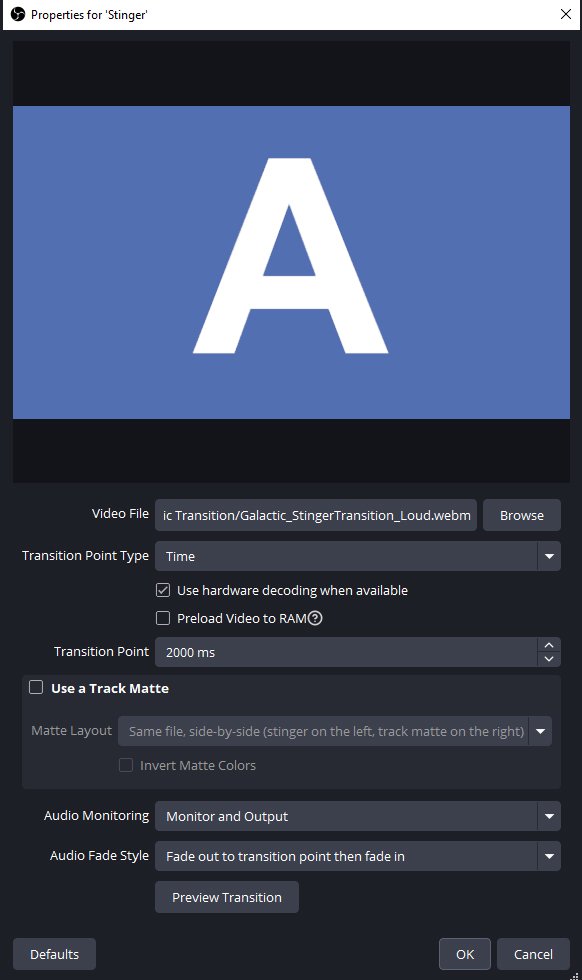
4. Congure the Stinger Transition
A new properties window will pop up:
• Name your stinger transition (e.g., My Stinger), then click
OK.
In the next window, configure the following:
Video File: Click “Browse” and choose your .webm file.
Transition Point Type: “Time (milliseconds)”
Transition Point (ms): 2000. This means OBS will switch scenes 2 seconds into your stinger animation.
Audio Monitoring: Choose your preferred setting:
• Monitor Off: Only the audience hears the transition sound.
• Monitor Only: Only you hear the transition sound.
• Monitor and Output: Both you and the audience hear the
transition sound.
Audio Fade Style (optional):
• This how the sounds between your scenes change, not the transition
sound itself.
5. Click OK
• After configuring everything, click OK to save the transition.
6. Test It
• Switch between any two scenes.
• Your stinger should play and the scene change should
occur at the 2-second mark.