For stream alerts to work within OBS, they need to be hosted within a third-party app such as Streamlabs or Stream Elements.
The code supplied in this tutorial are for alerts created by Looping Vids, however this methodology can be applied to most alerts if you play around with the values.
After following this tutorial, you will know how to:
1. Reposition, scale and style dynamic text
2. Change the fade in and fade out time of dynamic text

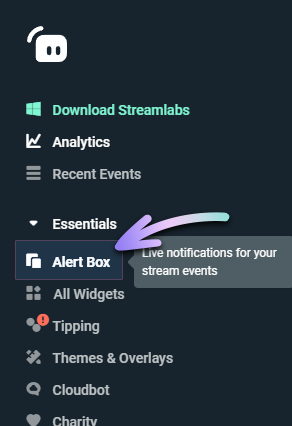
Step 01
Open Streamlabs in your web browser, then select “Alert Box” from the left menu on your dashboard.
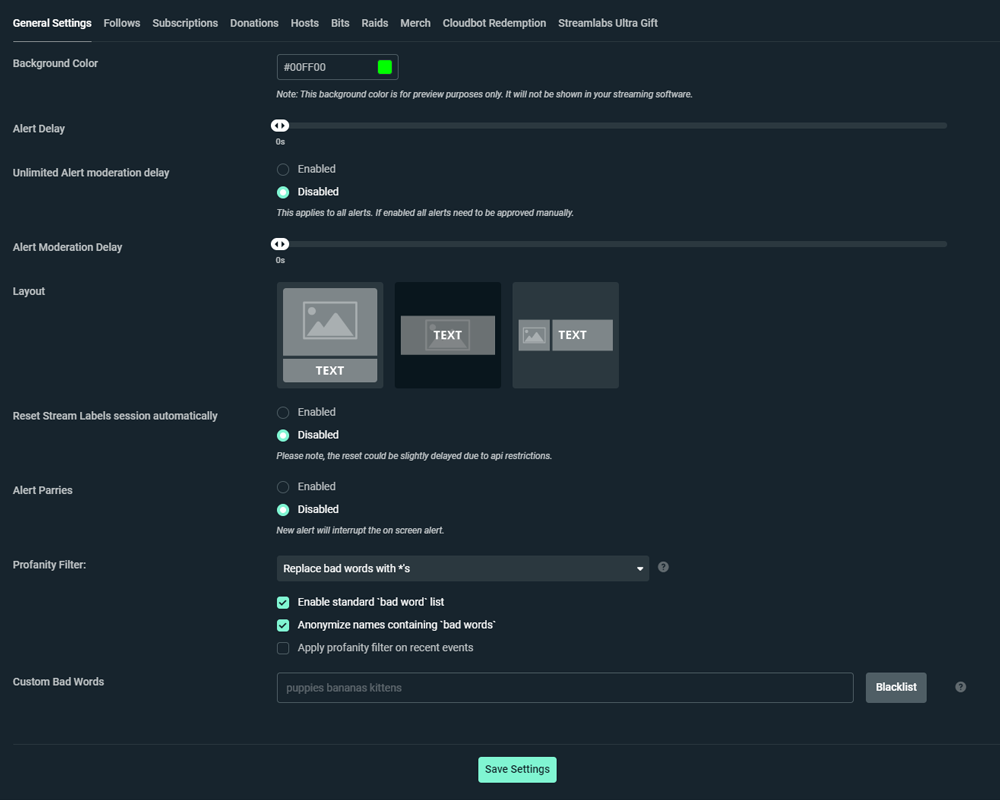
Step 02
Set the following General Settings:
Alert Delay: 0s
Alert Moderation Delay: 0s
Layout: Middle Option

Step 03
Now Select the “Follow” tab and enter in these settings:
Follow Alerts: Enabled
Layout: Middle Option
Alert Animation: Fade In & Fade Out
Message Template: {name}
Text Animation: None
Image: Upload the Looping Vids .webm alert file from your computer.
Sound: Upload the Alert sound .wav file from your computer.
Sound Volume: Leave at 50% – You can adjust this later if needed.
Alert Duration: 6s
Alert Text Delay: 1s
Enable Custom HTML/CSS: Enabled

Step 04 – Repositioning Text
Click on the “CSS” tab. At line 24, you should see “#alert-text.
Replace the “padding” code with this:
padding-top: 100px;
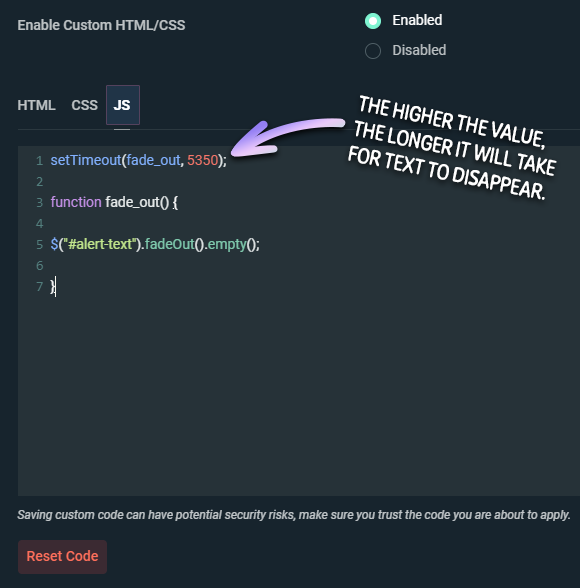
Step 05 – Changing the fade out time of text
Click on the ‘JS’ tab. You will find this next to the ‘CSS’ Tab.
Enter in this code:
setTimeout(fade_out, 5350);

function fade_out() {

$("#alert-text").fadeOut().empty();

}
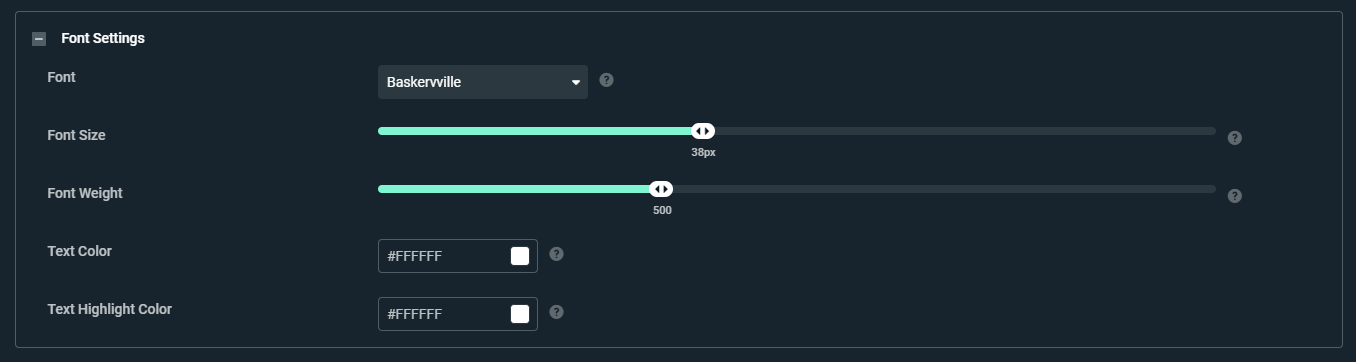
Step 06 – Styling the text
Scroll down until you find the Text Styling section. Expand it, then enter these settings:
Font: Baskervville
Font Size: 38px
Font Weight: 500
Text Color: #FFFFFF or whatever you prefer
Text Highlight Color: #FFFFFF or whatever you prefer
Note: If you change the font to something different than what’s mentioned above, the text’s position may change along with it. Simply play around with the padding value in the CSS code until it is correctly centred again.
